I have several affiliate links in both my posts and on the sidebar. All opinions are mine! Thanks so much for your support.

Friday, June 1, 2012

Friday Freebie - Patchwork friends

(image is linked)

These boxes are addicting...

...so I made another file.
This one has a scalloped edge on it. The texture is one that I had previously designed. I printed this out on 32# (heavy) paper that I picked up at Staples. It costs about the same as card stock (about 0.03 each) but the paper is easier to work with than card stock. But it is still heavy enough to hold up well. The paper also takes color ink well.
The MTC file can be downloaded here through June 15 (free).

Thursday, May 31, 2012

My Hex box - some examples!

I am so pleased to highlight some examples of the box that I posted yesterday.
Mervale called this her "before breakfast, before work "Nelda Box". 

Gailpage used some Colorbok paper from Walmart to make hers. 

Thanks so much for all the nice comments! If you would like to have your box featured here, just post a photo on the forum or email it to me at neldacnm at yahoo. I would be happy to include your interpretation of my file.

There are some who would like to make it a little bigger, so I have this file for you. 
This will make a box about 3.25" high and 4" wide on 2 sheets of 8.5 x 11 paper. In order to keep the top and bottom separate, I have the bottom colored with a teal texture (above) and the bottom in a yellow texture. If you do not want to use score lines, I have them on different layers as well. Download the MTC file here (free until June 15). 

Free MTC Box file: Hexagon box

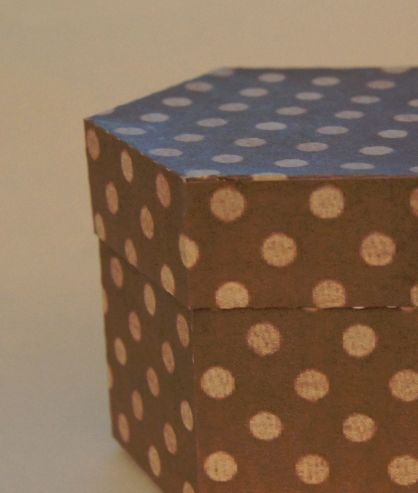
You can always use a box file, right? This one is a perfect size for small trinkets or gifts. I made it from 8.5" x 11" and it made a box about 2.5" (H) by 3.25" (W). You can make an even bigger box with 12" x 12" paper or if you split the files onto 2 different pages.
You can get the free MTC here (through June 15).

Tuesday, May 29, 2012

Tutorial: Shaped Edge card with cut-outs

I had a request for a tutorial on this type of card. Reba made one and posted it on the MTC forum here. She included a file to show how she designed the card.
The request was to use this file (available free from Dave through June 7th  here) to make a similar card.
She did not need the colored parts, just the blue part to be used as the base for the card.
Open the file and delete the layers with the unwanted colored parts.
Mirror it (use the mirror button) and re-size it to a workable size.  BTW you do not need to mirror it - but I like it better with the angel looking to the inside of the card. If you do not mirror it, the remainder of the steps are the same but the image will look slightly different.
Select the image and shadow it. The depth of the shadow depends on you, I usually make it thick enough to allow for good support around the edge.
Add rectangles to the shadow layer (I changed the shadow layer to white first but this is not needed). This layer will become the card base; the fold edge should be straight, as well as the base. The bottom edge can remain irregular but if the bottom edge is not straight, the card will not stand up on its own.
You may want to zoom in to be sure that the rectangles meet the edges of the shadow evenly.
Weld the rectangles and shadow together (I changed it to white - but you do not need to).
Now choose all (the shadow and the image) and join them together. This will make the cut-outs in the card base. Change it to white for the next step.

Make an inner shadow of this piece. I make it just a little smaller than the actual front of the card so that I have a little fudge room when placing it inside. (I think Reba made it the same size, either way will work but it does need to be made now before going further with the design of the card.) I moved the layer below the card base and locked it.
Now make the other half of the card. You can do this 2 different ways, depending on what you want. The upper example shows the card with both inside and outside with shaped edges. Just mirror the base, blackout, and move to the left. Then weld these 2 base layers together and add a score line if desired.
For the lower card, start with the mirrored image moved to the left but add a rectangle to it (use the shaped base to help you size it). Weld all three base shapes together to form the final card base. Add a score line and you are finished.

Hope that helps if you want to make this type of card. Not all images can be used like this, you need to start with a stencil-like image for the part that will be cut out.

Tuesday, May 22, 2012

Last chance for the Clearance items at LD!

Don't you just hate it when something is the "last chance" to get it? It makes me nervous and I start buying things! Well if you are that way as well, you might want to avoid this sale....or maybe not? 

Monday, May 21, 2012

Another (free) MTC Grad card file

This one is based on the idea presented in this youtube video:
She does not provide a template so I thought I would design one. I based it on the previous file that I had already designed. I did need to length the depth of the brim, otherwise it is almost the same.
I have not cut this one out yet from card stock, just from paper as a mock-up so I do not have pictures. If you would like the MTC file, it will be available free through May 31 here.