I have several affiliate links in both my posts and on the sidebar. All opinions are mine! Thanks so much for your support.
Showing posts with label MTC. Show all posts

Thursday, December 19, 2013

Homemade Vanilla.. (and free labels)

If you have never tried homemade vanilla extract, you don't know what you are missing. If well-made (more on that later) it is fabulously better than any store bought (especially the imitation of course!) I made vanilla extract last year for the first time and perfected my technique. I made about 32 oz. this year for gift-giving to my co-workers and friends.

The most important things to know about making vanilla is the concentration (ratio of beans to alcohol) and the time needed for extraction. I used the information from here for the recipe.  It is important to remember that it cannot be called "extract" (by FDA designation) unless there is at least 0.8 oz of vanilla per cup of alcohol (you must use alcohol in order to extract the favor from the bean. But remember that the alcohol bakes off leaving just the flavor behind). I used 1 ounce of beans per cup of vodka, which is slightly more than the required amount.  I aged it for more than 6 months to extract all the vanilla flavor before decanting into bottles.
The very best instructions and information for making vanilla is found on the Vanilla Review blog, so be sure to check it out. I purchased my vanilla beans from Vanilla Products off ebay, just be sure to get Grade B (extract) beans. I tried Grade A, and they did not extract as well. The beans were soft, supple, with a wonderful fragrance, and easy to cut.
You might recognize these bottles, I ...ahem... "recycled" them from Cracker Barrel (they originally had syrup in them). Ask nicely and leave your waitress a generous tip! I ran them through the dishwasher, removed the labels (Goo Gone is your friend here) and then ran them through the dishwasher again.

I also purchased these 2 oz. Boston Round bottles from Amazon but had to use the CB bottles when I ran out of the purchased ones. They are slightly bigger than the CB bottle (2 oz instead of 1.5 oz), and need no prep before use (although I did run them through the dishwasher as well).
On to the labels. I designed these in Make-The-Cut and designed a non-personalized version for you as well. Even if you do not own a cutting machine, MTC is the easiest and most intuitive program for this kind of designing. Way, way easier than Adobe Illustrator. I cannot recommend it any higher. I am an affiliate so check out my link (see sidebar) if you want to try it. You can download it and try it for free to see how it works (It is fully functional other than it cuts a diagonal line though the cuts until your purchase it. You also cannot save to the different formats).
Here's a screen shot of the labels I designed for you. In case you don't have a cuttting machine, they are designed to be used with the Fiskars X-large Oval Punch.
In order to protect the label from dripping vanilla, I covered it with a glossy clear covering (The Duck brand that I found was clear and glossy. Clear Contact paper is matte and frosted, it will work but is not as professional looking).  The covering made them a bit thicker but I was able to punch them out without too much pressure.   I used my ATG gun to attach these to the bottles but any permanent adhesive will work.
You can see the clear covering in this photo. And you can download the non-personalized labels here for the next few days.
I also designed (in MTC again) a round gift tag. I have a non-personalized version for your use as well if you would like to download it (free until the end of the year)!  I drew in the holly and berries on mine but added a printed one for you. I found the holly image (free) here. I traced it in MTC to get solid colors.
Punch holes for the cord (I used a Fiskars hand punch that makes two holes but I can't find a link to it), attach with elastic cord...
or baker's twine (which is easier than the elastic cord).
Place in plastic bags (I used these and they fit perfectly) and tie with a festive yarn.        
  And you are all ready for gifting! 

(Although I have provided affiliate links for the supplies, I actually purchased most of my supplies locally at WalMart, Michaels or JoAnns. I did not receive any free supplies. Links are provided for those who cannot find them locally.)

Monday, August 1, 2011

Flower Cut-outs - free file and texture

As promised, here are the flower cut-outs that I posted about yesterday. I did cut these out (yellow blade, at force of 15 for 24# printer paper) and they cut out without any problems (other than my mat was a bit too sticky - I had just sprayed it, lol!).
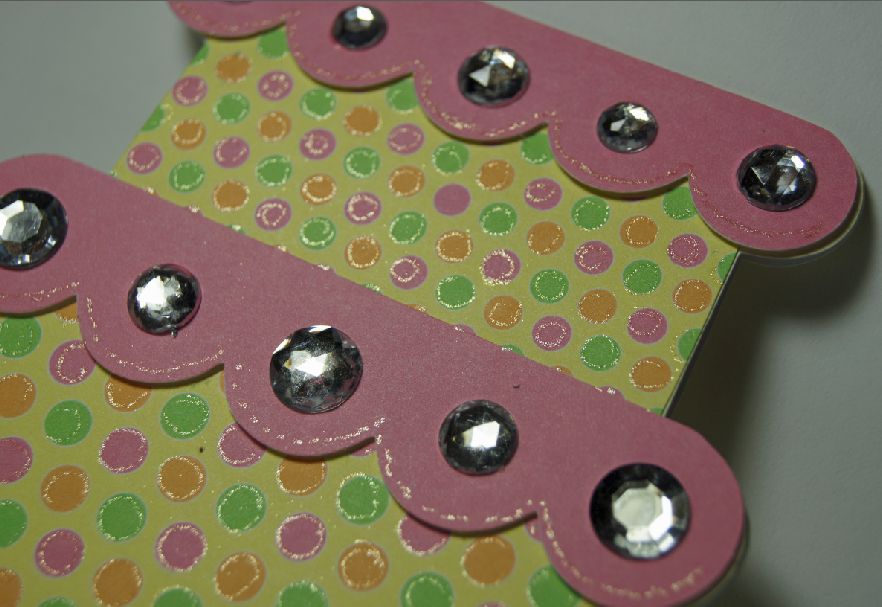
I think my favorite one is the 12 petal (with the dark pink middle). I placed bling in the center because I had some handy but you could use another circle, a brad or even a button. I think the one pointy shape (4th one from the left below) would look great as a sun.
Enjoy crafting and as always I would love to see any projects you make with these. Download the file by clicking here or on the image below. The yellow dotted texture is embedded in the file.

Monday, July 4, 2011

Free Border file - Entwined arches

Here's another border file for you. I designed this one in MTC but have not cut it yet. It has several different variations. Let me know if there are any problems with it.
Thank you to those who have made purchases at Lettering Delights through my links. It has really helped out and I appreciate it. I appreciation, I will continue to provide free files here for you as well. Enjoy and as always, I would love to see some of your projects with these files.

Download file here or click image above.

Friday, July 1, 2011

Circle Border

This is a simple circle border with corners for you to use.
For the file, click on image above or here.

Wednesday, June 29, 2011

Gerber Daisy Border (free)

Another border to add to your collection. This one also includes a lace that can be threaded with a ribbon.
You can download the file here.

And there is an awesome bundle deal at Lettering Delights for their Two for Tuesday deal.. If you do not already have these sets, check out this great deal. It is a bundle worth $44 for just $5 until July 4. Check it out  (image below if linked).

Tuesday, June 28, 2011

Update for the border file - corner added

I finished the corner for the arched border file that I had previously released here. You can easily adjust the length of the border as needed.
The file can be downloaded here or by clicking the image above.

Creating textures for MTC from LD paper packs (revisited)

With all the cute paper packs at Lettering Delights (that match colors in the the graphics), I had been using this method to convert them to a usable file in MTC. But thanks to a comment by a reader (thank you cfine!) I have been doing it a different way on some of the papers. This does not produce a seamless texture. My method uses her idea but is a bit different.

This method does involve using PhotoShop Elements (PSE), but the other one did as well. You may be able to do this in other graphics programs (maybe Paint, or PSP).

Open the file in PSE. For this tutorial I am using the harlequin file from the Lettering Delights At Home Paper Pack.
Now go to Image-Resize-Image size. Change the numbers to get a usable result. I like to stay below 528x 528 pixels for MTC (even lower is better) but it is a compromise between your image quality and how much you will tax your system resource with the larger files. If I only have one texture, I will use close to 528. If I have more textures in a project, I tend to lower the pixel number. For this I chose 520 pixels, 4 inches and 130 dpi. Most of my projects are 4-5 inches or less, so this is the perfect compromise for me. You can alter to suit your needs.
I save it as a png and include the information (size and pixels).
For use in my project, I right click to bring up the menu for textures.
And navigate to where my texture is saved and open it.
Before applying the texture, I will re-size it using the scale option so that the texture is just a little bit larger than the shape. The mat that I am filling is 4.7559 x 3.6235. I enlarge the texture (using the slider and arrow keys) until it is 4.76" square.
Here is what my mat looks like after applying this texture.
I am now ready to cut! Do you notice more Lettering Delights sets in there? I totally mixed-and-matched this project. The Chinese Character is from DoodleBat DB KanjiWords A-G, the bamboo is from the Asia SVG (part of the new Cut Its Simple Shapes), and the paper is on sale! Stay tuned for a post of the card itself - I am getting ready to cut it now.

Speaking of sales, you did read my last post about all the 0.50 sale items at Lettering Delights? Try doing a search for Paper Packs, and start about halfway through - you will see gobs and gobs of sets on sale! Check them out - now you can easily use them within MTC! (image is linked)

Wednesday, May 25, 2011

Free Card file

OK, I saw this somewhere and thought it was cute, so I made my own. I am sure it is nothing like the one I saw but I like it. Of course I added some bling as well.

They were so fun and easy that I made two of these. The second one (the yellow and white) was designed, printed, and cut completely in MTC using the new Silhouette plug-in. It works great! I used a silver gel pen on the cake stand and the texture is one I designed myself.
 There are a few tips to remember:  be sure you watch Andy's video and also read this post. The two things I have to remind myself to do: 1) use landscape for everything (my printer defaults to portrait so I have to change it every time) and 2) leave the eye open (unhide) the layer with your registration marks when you are cutting. I turned by eye off (hid the layer) and it would not cut correctly - took me a while to figure out why!  It is really easy to use if you remember these tips.

Here is what the MTC file looks like. I have "outline shapes" checked so that you can see the design - remember to turn this OFF for printing.
And here is the file that you have been waiting for - click here for the MTC file for this card\ and here for the Silhouette Studio file.   Enjoy! And I would love to see some of your cards if you make them.


Files removed because of a complaint. I will be posting directions on how to make this ever-so-simple card in the future. It is so easy to make with MTC with Basic Shapes, joins & welds, and your imagination! I showed a little of the process in this post.

Tuesday, May 24, 2011

First cuts with the new Silhouette plug-in for MTC

Awesome work, Andy! He never fails to come through for us. We have been waiting for the beta version of the plug-in and here it is. And there's even more coming with the next version - Silhouette users will have their own mat and it will be even better. But I am a happy camper right now, as it is.

Andy has a screenr video cast here that discusses using the plug-in, check it out and them get started cutting!

And here (drum roll please...) are the results of my very first cut after watching the video.

This is graphic #8 in the Big Truck graphic set. I cut it at just a little over 4 inches. I was amazed at how well this was cut out - it was perfect (well, except for my mistake - more on that later). Even the little space between the cab and the dump bed was cut perfectly. Take a look at the graphic set and you will see that the outlines are every thin around the graphics. The trace is that good and the cut that accurate.
 And notice with black window trim - it is about 1/32" wide (less than 1 mm), and it cut perfectly as well!
Oh yeah, above, you may be able to see that the black line is thicker where I've marked it wit red? Yeah, that's my goof-up. I placed a cut line to cut out the window and did not align it correctly (see below). Let's just say that a little Copic marker goes a long way in covering up some mistakes!
If you have a Silhouette (or another cutter) you need to check out Make The Cut software.

Tuesday, May 17, 2011

Butterfly card

I love these bright colors. This is a simple shaped card. I wasn't sure what to do for the antenna but I decided to use my new bakery twine. I purchased it at The Twinery. The price was good and the shipping was quick. Check them out!

The butterfly was the third one from LD's Sweet Spring SVG collection.
It was a simple card with a shadow for the background fill and then a shadow for the base.

I designed the card in MTC, and then exported to png, and printed and cut from Sil Studio on the Silhouette.  Here is a screen shot of my layout. Notice that there is a cut shape within the greyed area at the left. I have found that I can cut from that area (just stay within the red line) as long as there is nothing printed in the grey area (notice that the blue printed area does not cross over into the grey-shaded area). I have also moved the registration marks to the smallest margin (0.395) and reduced them in size to 10 mm. This gives me a little more real estate on my page.  And I still get very accurate PnC cards!

The card is joined at the top and the yellow butterfly is popped up. 

And Lettering Delights has released some new svgs today. Don't they make you think of warn sunny days at the beach? Just in time for summer cards or summer scrapbook layouts. The Something Fishy collection is even on sale now. These are definitely on my wish list!


Wednesday, May 4, 2011

Day 4 MTC Blog Hop (and some Blog Candy!)

If you are on the Make-The-Cut! Blog Hop, you should have come from Every Day Little Things.  This is the fourth day of the hop and I am the hostess for May 4.

A big welcome to all my friends from the MTC forum and also to any newbies that may have found out about the Blog Hop! MTC is one of the easiest programs to use for designing files to be cut on an electronic cutter like the Gazelle, the Silhouette SD, the eCraft, the Pazzles, the Lynx and Cougar - and now the KnK!. Hop on board the Blog Hop - by the end of the month you will be convinced of this as well (if you are not already!)

Today I have a cute card project for the little boy (or maybe the "big boy") in your life! This card could be used in many ways (get well, missing you, thinking of you, etc.) but I chose to make it a birthday card.

I used the Lettering Delights Fast Car graphic set to make this shaped card. (image is linked). I will provide the MTC file for the card and envelope, you will need to head over to Lettering Delights for the graphic file. (Hopefully you picked it up during the Lettering Delights sale that they had. If not, run right over to get it now. This one is a keeper!)


This is a wonderfully colorful set that inspires the vrooom, vroooom from me! Can't you just see all those little cars racing around a track? Maybe it has something to do with the Indy 500 and the fact that I live in Indianapolis? Or that Race Day is coming up on May 29? Uhhh, maybe!


I used Make The Cut! to design the card, exported the file to png, and imported it into Silhouette Studio for cutting as a Print-n-Cut project.  Why did I use the Silhouette Studio instead of MTC? Well, because I am waiting for Andy to finish the plug-in for the Silhouette. MTC will cut currently from the print driver to the Silhoette, not directly from the cutting button. But once he gets the plug-in completed, I will be using MTC for both printing and cutting. (I was hoping it would be ready by today and I was ready to edit this post but check back soon! It is coming.) Here is what my screen looked like in MTC:


The Silhouette - when used with the automatic three-point registration (in Silhouette Studio) - is hands-down the best cutter (to date IMHO) for PnC. According to Andy, the new plug-in "takes advantage of all the Silhouette's features..." To me that means three point registration for easy and accurate PnC!  Did I say that I can hardly wait to see it! On April 23 he promised it would be ready in 7-14 days, so it should be ready by May 7! (not that I am counting or anything, lol!)

Now for the nitty gritty details on making this card. The car is popped up with pop dots. The graphics and sentiment inside were adhered flat to the card. The font used inside was Chachie. I also designed an envelope for the card, since the smallest size acceptable for mailing is 3.5x5", this one is just a smidge bigger. (I will sheepishly admit to cutting the envie by hand! I was in too big of a hurry to put it together).  There is also a graphic on it, but that is optional. I added the little puff of smoke behind the cars by hand with a black gel pen, and filled it in with a white gel pen.

Today I have for you the shape for the card and instructions on how to add in the graphic after you purchase it. Import the file as a texture into MTC, then reduce to 25% (both the shape and the texture). It should fit into the silhouette of the car perfectly. The "Zoom" needs to be reduced to 20%.  The MTC file for the card and envie is here (it will download when clicked).

The envelope is my own design and my own texture. I have included in on page 2 of the above file.

Oh yeah - the Blog Candy! Can't forget that, now can I? A $5 Lettering Delights Gift card is up for grabs. All you need to do is:
1. Become a follower of my blog,
2. Leave a comment telling me what you would create with this graphic set if you had it, and
3. Leave a way for me to contact you (your MTC forum name is fine).

Open until 11:59 pm EST on May 4. I will use Random.org to choose a winner and will post the winner on here by 5 pm Thursday. Good luck! And stop back tomorrow for more goodies!

Have a blessed day!

Friday, April 29, 2011

Party on!

Thank you everybody for all the nice comments in the last few days. I enjoy reading them. And today I have yet another card for you. My mojo is flowing well now, hope it doesn't get bogged down after the weekend of work!

This is for a very special lady in my church who is turning 96 this week. I tried to come up with a demure traditional card for her, but it just was not in me!

The image is from Lettering Delights Party Pal graphic set. I designed, printed and cut the card in Silhouette Studio; designed and printed the envie in MTC.

Here's the screen shot of Silhouette Studio before printing and cutting. The font at the top is Fancy Pants (free at dafont), at the bottom Dancin Let (also free here).

Here's the screen shot of my MTC screen before printing:

The texture and the envie are my own design so I can share with you (but not the graphic; sorry, you'll have to pick it up at Lettering Delights). Hey, I just now realized I was not consistent and used yet another font spiced things up with another font on the front! I liked the little sparkles (which I guess are really snowflakes); you can get the font Frosty here and the MTC file here.

I blinged out the front with the Gelly Roll clear Stardust pen. I love the sublte bling that it gives; you can't really see it in the picture but I know it is there.

I hope that I can be as active, healthy, and blessed as my friend is at 96. Enjoy and have a blessed day!