First start with the file of the bird. I choose this one because it was free with membership with Lettering Delights (you can check out Lettering Delights with the link at the top of my blog). The bird is from Banner Day graphics set gs_bannerdayfun.
Step One: Bring in the bird to MTC
Bring in the bird by opening it in MTC through Pixel Trace at the standard setting of 127. This will be the black body of the bird.

Bring in another bird, but trace this one at 207. Through experimentation, I found that 206 will not trace the entire bird, but 207 will. So I choose to go with this setting (I figure it might be more sensitive to small changes). This will be used for the outline of the bird as well as a way to obtain the orange of the beak and legs.

In order to obtain shapes for the orange of the beak and bird I need to omit the first bird (black body) from the remainder of the bird. What will be left will be the orange parts (which I can not get to trace separately). I can do this with Boolean join of the 2 shapes. Make a copy of the first bird and lay it over the second bird. Pay careful attention to the shape of the beak when overlapping the two.

Now do a Boolean Join (Ctrl-U) and choose the option that leaves just the beak and legs. With me it was the second choice. (BTW, doing a screen capture at this point always causes an error in MTC for me and makes MTC shut down. Lesson: be sure to save often!)

You probably have a few extra pieces after the join, not just the beak and legs. No problem, just move the beak out of the way then select and delete the extra pieces.

I move the legs and beak out of the way and then importe another bird at 207. I make a shadow of this bird, using a shadow width of 0.0600.

Now delete the bird and just keep the shadow. You now have the shapes that you need to cut!
But I like to check that everything fits together well, so I move everything into place and color it first. I change the color of the shadow to white and then place the shadow behind the body shape. Next select the beak and legs, put them on their own layer and change their color to orange. Then arrange them into place on the bird. 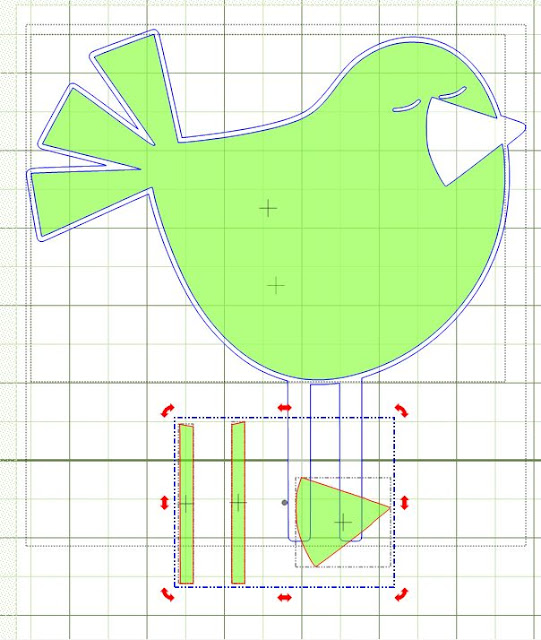

Here is the completed bird file, with the colors changed and the pieces fitted together. Note that each of colors is on its own layer.

See next entry for Step Two.
1 comment:
What a COOL tutorial! I am anxiously awaiting part two! *Hugs*
Post a Comment