As promised, here are the flower cut-outs that I posted about yesterday. I did cut these out (yellow blade, at force of 15 for 24# printer paper) and they cut out without any problems (other than my mat was a bit too sticky - I had just sprayed it, lol!).
I think my favorite one is the 12 petal (with the dark pink middle). I placed bling in the center because I had some handy but you could use another circle, a brad or even a button. I think the one pointy shape (4th one from the left below) would look great as a sun.
Enjoy crafting and as always I would love to see any projects you make with these. Download the file by clicking here or on the image below. The yellow dotted texture is embedded in the file.
I have several affiliate links in both my posts and on the sidebar. All opinions are mine! Thanks so much for your support.
Showing posts with label Silhouette. Show all posts
Monday, August 1, 2011
Thursday, May 26, 2011
Under construction
Honk, honk! Beeep! Coming on through...
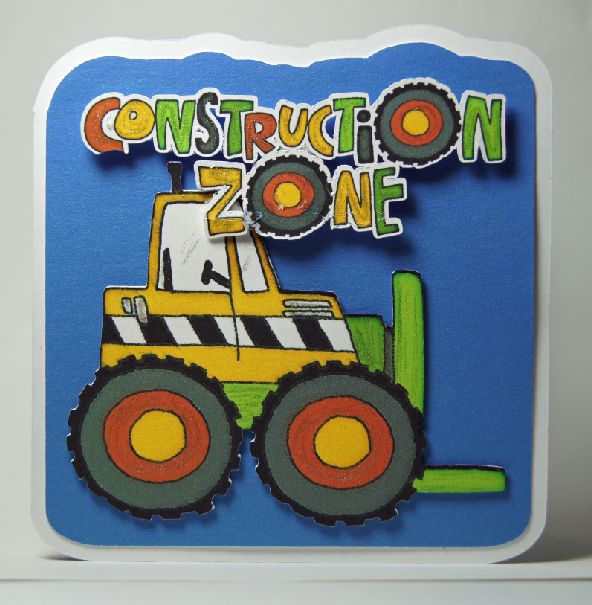
Boys and their toys! I needed a shower card for a new baby boy and thought this would work. I used the Big Truck graphic set from LD and came up with this.
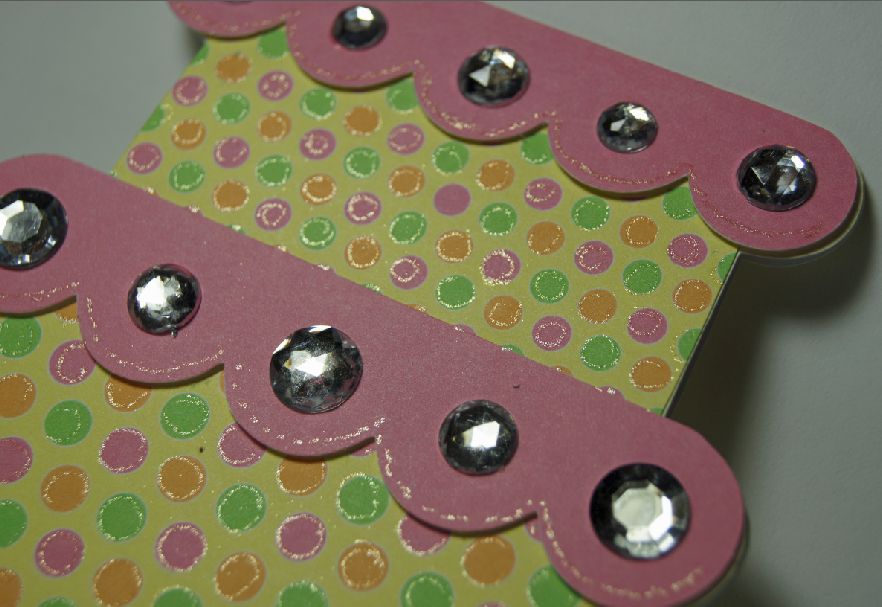
And even though it was for a little boy, I needed a little bling....
The inside sentiment followed the construction theme.
I nabbed the feet off the internet and made up my own sentiment. If you have boys in your life, check out the Big Truck graphic set at Lettering Delights.
Boys and their toys! I needed a shower card for a new baby boy and thought this would work. I used the Big Truck graphic set from LD and came up with this.
And even though it was for a little boy, I needed a little bling....
The inside sentiment followed the construction theme.
I nabbed the feet off the internet and made up my own sentiment. If you have boys in your life, check out the Big Truck graphic set at Lettering Delights.
Wednesday, May 25, 2011
Free Card file
OK, I saw this somewhere and thought it was cute, so I made my own. I am sure it is nothing like the one I saw but I like it. Of course I added some bling as well.
They were so fun and easy that I made two of these. The second one (the yellow and white) was designed, printed, and cut completely in MTC using the new Silhouette plug-in. It works great! I used a silver gel pen on the cake stand and the texture is one I designed myself.
There are a few tips to remember: be sure you watch Andy's video and also read this post. The two things I have to remind myself to do: 1) use landscape for everything (my printer defaults to portrait so I have to change it every time) and 2) leave the eye open (unhide) the layer with your registration marks when you are cutting. I turned by eye off (hid the layer) and it would not cut correctly - took me a while to figure out why! It is really easy to use if you remember these tips.
Here is what the MTC file looks like. I have "outline shapes" checked so that you can see the design - remember to turn this OFF for printing.
And here is the file that you have been waiting for -click here for the MTC file for this card\ and here for the Silhouette Studio file. Enjoy! And I would love to see some of your cards if you make them.
Files removed because of a complaint. I will be posting directions on how to make this ever-so-simple card in the future. It is so easy to make with MTC with Basic Shapes, joins & welds, and your imagination! I showed a little of the process in this post.
They were so fun and easy that I made two of these. The second one (the yellow and white) was designed, printed, and cut completely in MTC using the new Silhouette plug-in. It works great! I used a silver gel pen on the cake stand and the texture is one I designed myself.
There are a few tips to remember: be sure you watch Andy's video and also read this post. The two things I have to remind myself to do: 1) use landscape for everything (my printer defaults to portrait so I have to change it every time) and 2) leave the eye open (unhide) the layer with your registration marks when you are cutting. I turned by eye off (hid the layer) and it would not cut correctly - took me a while to figure out why! It is really easy to use if you remember these tips.
Here is what the MTC file looks like. I have "outline shapes" checked so that you can see the design - remember to turn this OFF for printing.
And here is the file that you have been waiting for -
Files removed because of a complaint. I will be posting directions on how to make this ever-so-simple card in the future. It is so easy to make with MTC with Basic Shapes, joins & welds, and your imagination! I showed a little of the process in this post.
Tuesday, May 24, 2011
First cuts with the new Silhouette plug-in for MTC
Awesome work, Andy! He never fails to come through for us. We have been waiting for the beta version of the plug-in and here it is. And there's even more coming with the next version - Silhouette users will have their own mat and it will be even better. But I am a happy camper right now, as it is.
Andy has a screenr video cast here that discusses using the plug-in, check it out and them get started cutting!
And here (drum roll please...) are the results of my very first cut after watching the video.
This is graphic #8 in the Big Truck graphic set. I cut it at just a little over 4 inches. I was amazed at how well this was cut out - it was perfect (well, except for my mistake - more on that later). Even the little space between the cab and the dump bed was cut perfectly. Take a look at the graphic set and you will see that the outlines are every thin around the graphics. The trace is that good and the cut that accurate.
And notice with black window trim - it is about 1/32" wide (less than 1 mm), and it cut perfectly as well!
Oh yeah, above, you may be able to see that the black line is thicker where I've marked it wit red? Yeah, that's my goof-up. I placed a cut line to cut out the window and did not align it correctly (see below). Let's just say that a little Copic marker goes a long way in covering up some mistakes!
If you have a Silhouette (or another cutter) you need to check out Make The Cut software.
Andy has a screenr video cast here that discusses using the plug-in, check it out and them get started cutting!
And here (drum roll please...) are the results of my very first cut after watching the video.
This is graphic #8 in the Big Truck graphic set. I cut it at just a little over 4 inches. I was amazed at how well this was cut out - it was perfect (well, except for my mistake - more on that later). Even the little space between the cab and the dump bed was cut perfectly. Take a look at the graphic set and you will see that the outlines are every thin around the graphics. The trace is that good and the cut that accurate.
And notice with black window trim - it is about 1/32" wide (less than 1 mm), and it cut perfectly as well!
Oh yeah, above, you may be able to see that the black line is thicker where I've marked it wit red? Yeah, that's my goof-up. I placed a cut line to cut out the window and did not align it correctly (see below). Let's just say that a little Copic marker goes a long way in covering up some mistakes!
If you have a Silhouette (or another cutter) you need to check out Make The Cut software.
Just Be-Claws
Everybody is lovin' the new Something Fishy graphics from Lettering Delights. I just couldn't resist making a card with the little crab because it was so cute and would make a great "anytime" card. You can never have enough of those!
The paper was from the Something Fishy set as well. This shaped card was designed and cut in Silhouette Studio. But not to worry - the MTC plug-in for the Silhouette is coming soon - look for it in the next few days!
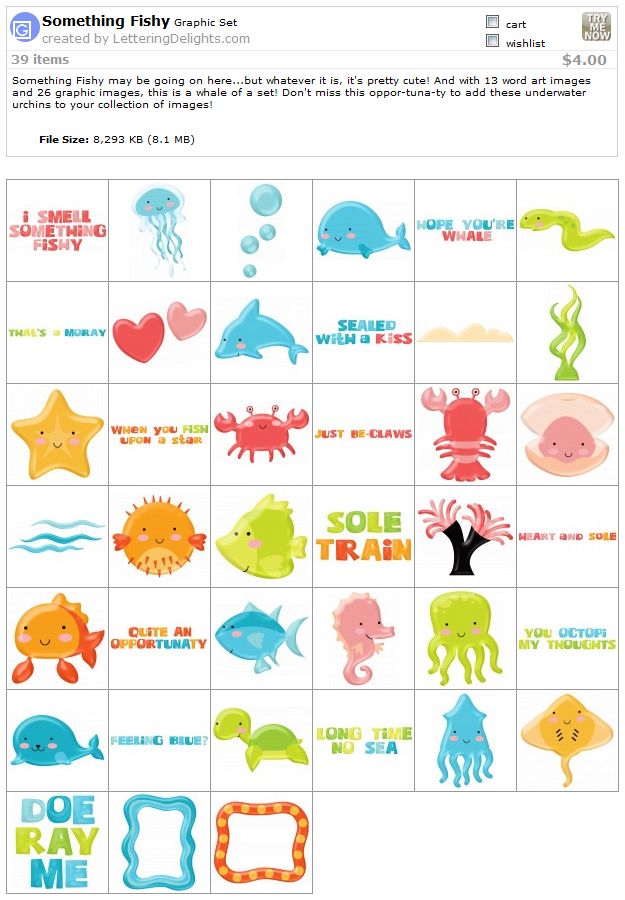
Here's the rest of the set - they are all so cute and cheerful. Grab yours today at Lettering Delights! There is a graphic set, an alphabet, a paper pack and an SVG set. You can pick up the collection like I did here. It's on sale for $6 right now - and don''t forget to use your coupon UndertheSea to get 40% off!
The paper was from the Something Fishy set as well. This shaped card was designed and cut in Silhouette Studio. But not to worry - the MTC plug-in for the Silhouette is coming soon - look for it in the next few days!
Here's the rest of the set - they are all so cute and cheerful. Grab yours today at Lettering Delights! There is a graphic set, an alphabet, a paper pack and an SVG set. You can pick up the collection like I did here. It's on sale for $6 right now - and don''t forget to use your coupon UndertheSea to get 40% off!
Thursday, May 19, 2011
Toadally Awesome...
...even if I do say so myself. This is another Riddle card for Dylan. I just fell in love with the cute little frog in the Frog graphic set and papers from Lettering Delights. The white that you see around the edges of the popped up pieces is actually the edge of the paper. The PnC is so awesome with the Silhouette cutter that I rarely ever see even a small margin around the image.
Here is the layout in Silhouette Studio for the card:
The inside has riddles on the left side to entertain Dylan.
Here is a link to the graphic set in case you would like to replicate the card.
Don't you just love this playful little froggy?
Yes, I did layer his tongue! I tried to use a wobbly on the fly to make him wiggle but it didn't look right so I ended up just using pop dots. Hope you have as much making this card as I did.
(PS: Andy,. I am still waiting for the Silhouette plug-in, hint, hint!)
Here is the layout in Silhouette Studio for the card:
The inside has riddles on the left side to entertain Dylan.
Here is a link to the graphic set in case you would like to replicate the card.
Don't you just love this playful little froggy?
Yes, I did layer his tongue! I tried to use a wobbly on the fly to make him wiggle but it didn't look right so I ended up just using pop dots. Hope you have as much making this card as I did.
(PS: Andy,. I am still waiting for the Silhouette plug-in, hint, hint!)
Wednesday, May 18, 2011
Fish card
I just love LD's latest Something Fishy collection. I don't have it yet but I went searching through the files I do have and found this cute little fish in the Seven Seas graphic set. He looks like a Freddy, don't you think?
I designed this card in Silhouette Studio. It is a simple shaped card. The little guy was facing the wrong way (at least I thought so!) so I just mirrored him before making the shadows. I welded a rounded rectangle to the base shadow to get a flat bottom card with the shape to the side and top. Here is a screen shot of my SS layout:
And the card:
After I made this card, I changed some of the elements of the design, specifically the back shadow for little Freddy. I also added the hat so that I could pop it up next time. Here is the new design:
For the final card I could not resist giving Freddy some goggle eyes! He has such a happy personality that they fit him well.
I found some pop-up squares that are not quite as thick so I was able to layer both the blue background as well as Freddy himself. A little Glossy Accents on his hat and he is ready to go swimming off, hopefully to add some cheer in a little boy's day. I added fish riddles inside (This card is for Dylan, you can check out one card drive for him here: http://dustinpike.blogspot.com/2011/05/freebie-and-call-for-cards.html).
I designed this card in Silhouette Studio. It is a simple shaped card. The little guy was facing the wrong way (at least I thought so!) so I just mirrored him before making the shadows. I welded a rounded rectangle to the base shadow to get a flat bottom card with the shape to the side and top. Here is a screen shot of my SS layout:
And the card:
After I made this card, I changed some of the elements of the design, specifically the back shadow for little Freddy. I also added the hat so that I could pop it up next time. Here is the new design:
For the final card I could not resist giving Freddy some goggle eyes! He has such a happy personality that they fit him well.
I found some pop-up squares that are not quite as thick so I was able to layer both the blue background as well as Freddy himself. A little Glossy Accents on his hat and he is ready to go swimming off, hopefully to add some cheer in a little boy's day. I added fish riddles inside (This card is for Dylan, you can check out one card drive for him here: http://dustinpike.blogspot.com/2011/05/freebie-and-call-for-cards.html).
Tuesday, May 17, 2011
Butterfly card
I love these bright colors. This is a simple shaped card. I wasn't sure what to do for the antenna but I decided to use my new bakery twine. I purchased it at The Twinery. The price was good and the shipping was quick. Check them out!
The butterfly was the third one from LD's Sweet Spring SVG collection.
It was a simple card with a shadow for the background fill and then a shadow for the base.
The butterfly was the third one from LD's Sweet Spring SVG collection.
It was a simple card with a shadow for the background fill and then a shadow for the base.
I designed the card in MTC, and then exported to png, and printed and cut from Sil Studio on the Silhouette. Here is a screen shot of my layout. Notice that there is a cut shape within the greyed area at the left. I have found that I can cut from that area (just stay within the red line) as long as there is nothing printed in the grey area (notice that the blue printed area does not cross over into the grey-shaded area). I have also moved the registration marks to the smallest margin (0.395) and reduced them in size to 10 mm. This gives me a little more real estate on my page. And I still get very accurate PnC cards!
The card is joined at the top and the yellow butterfly is popped up.
And Lettering Delights has released some new svgs today. Don't they make you think of warn sunny days at the beach? Just in time for summer cards or summer scrapbook layouts. The Something Fishy collection is even on sale now. These are definitely on my wish list!
Wednesday, May 4, 2011
Day 4 MTC Blog Hop (and some Blog Candy!)
If you are on the Make-The-Cut! Blog Hop, you should have come from Every Day Little Things. This is the fourth day of the hop and I am the hostess for May 4.
A big welcome to all my friends from the MTC forum and also to any newbies that may have found out about the Blog Hop! MTC is one of the easiest programs to use for designing files to be cut on an electronic cutter like the Gazelle, the Silhouette SD, the eCraft, the Pazzles, the Lynx and Cougar - and now the KnK!. Hop on board the Blog Hop - by the end of the month you will be convinced of this as well (if you are not already!)
Today I have a cute card project for the little boy (or maybe the "big boy") in your life! This card could be used in many ways (get well, missing you, thinking of you, etc.) but I chose to make it a birthday card.
I used the Lettering Delights Fast Car graphic set to make this shaped card. (image is linked). I will provide the MTC file for the card and envelope, you will need to head over to Lettering Delights for the graphic file. (Hopefully you picked it up during the Lettering Delights sale that they had. If not, run right over to get it now. This one is a keeper!)
This is a wonderfully colorful set that inspires the vrooom, vroooom from me! Can't you just see all those little cars racing around a track? Maybe it has something to do with the Indy 500 and the fact that I live in Indianapolis? Or that Race Day is coming up on May 29? Uhhh, maybe!
I used Make The Cut! to design the card, exported the file to png, and imported it into Silhouette Studio for cutting as a Print-n-Cut project. Why did I use the Silhouette Studio instead of MTC? Well, because I am waiting for Andy to finish the plug-in for the Silhouette. MTC will cut currently from the print driver to the Silhoette, not directly from the cutting button. But once he gets the plug-in completed, I will be using MTC for both printing and cutting. (I was hoping it would be ready by today and I was ready to edit this post but check back soon! It is coming.) Here is what my screen looked like in MTC:
The Silhouette - when used with the automatic three-point registration (in Silhouette Studio) - is hands-down the best cutter (to date IMHO) for PnC. According to Andy, the new plug-in "takes advantage of all the Silhouette's features..." To me that means three point registration for easy and accurate PnC! Did I say that I can hardly wait to see it! On April 23 he promised it would be ready in 7-14 days, so it should be ready by May 7! (not that I am counting or anything, lol!)
Now for the nitty gritty details on making this card. The car is popped up with pop dots. The graphics and sentiment inside were adhered flat to the card. The font used inside was Chachie. I also designed an envelope for the card, since the smallest size acceptable for mailing is 3.5x5", this one is just a smidge bigger. (I will sheepishly admit to cutting the envie by hand! I was in too big of a hurry to put it together). There is also a graphic on it, but that is optional. I added the little puff of smoke behind the cars by hand with a black gel pen, and filled it in with a white gel pen.
Today I have for you the shape for the card and instructions on how to add in the graphic after you purchase it. Import the file as a texture into MTC, then reduce to 25% (both the shape and the texture). It should fit into the silhouette of the car perfectly. The "Zoom" needs to be reduced to 20%. The MTC file for the card and envie is here (it will download when clicked).
The envelope is my own design and my own texture. I have included in on page 2 of the above file.
Oh yeah - the Blog Candy! Can't forget that, now can I? A $5 Lettering Delights Gift card is up for grabs. All you need to do is:
1. Become a follower of my blog,
2. Leave a comment telling me what you would create with this graphic set if you had it, and
3. Leave a way for me to contact you (your MTC forum name is fine).
Open until 11:59 pm EST on May 4. I will use Random.org to choose a winner and will post the winner on here by 5 pm Thursday. Good luck! And stop back tomorrow for more goodies!
Have a blessed day!
A big welcome to all my friends from the MTC forum and also to any newbies that may have found out about the Blog Hop! MTC is one of the easiest programs to use for designing files to be cut on an electronic cutter like the Gazelle, the Silhouette SD, the eCraft, the Pazzles, the Lynx and Cougar - and now the KnK!. Hop on board the Blog Hop - by the end of the month you will be convinced of this as well (if you are not already!)
Today I have a cute card project for the little boy (or maybe the "big boy") in your life! This card could be used in many ways (get well, missing you, thinking of you, etc.) but I chose to make it a birthday card.
I used the Lettering Delights Fast Car graphic set to make this shaped card. (image is linked). I will provide the MTC file for the card and envelope, you will need to head over to Lettering Delights for the graphic file. (Hopefully you picked it up during the Lettering Delights sale that they had. If not, run right over to get it now. This one is a keeper!)
This is a wonderfully colorful set that inspires the vrooom, vroooom from me! Can't you just see all those little cars racing around a track? Maybe it has something to do with the Indy 500 and the fact that I live in Indianapolis? Or that Race Day is coming up on May 29? Uhhh, maybe!
I used Make The Cut! to design the card, exported the file to png, and imported it into Silhouette Studio for cutting as a Print-n-Cut project. Why did I use the Silhouette Studio instead of MTC? Well, because I am waiting for Andy to finish the plug-in for the Silhouette. MTC will cut currently from the print driver to the Silhoette, not directly from the cutting button. But once he gets the plug-in completed, I will be using MTC for both printing and cutting. (I was hoping it would be ready by today and I was ready to edit this post but check back soon! It is coming.) Here is what my screen looked like in MTC:
The Silhouette - when used with the automatic three-point registration (in Silhouette Studio) - is hands-down the best cutter (to date IMHO) for PnC. According to Andy, the new plug-in "takes advantage of all the Silhouette's features..." To me that means three point registration for easy and accurate PnC! Did I say that I can hardly wait to see it! On April 23 he promised it would be ready in 7-14 days, so it should be ready by May 7! (not that I am counting or anything, lol!)
Now for the nitty gritty details on making this card. The car is popped up with pop dots. The graphics and sentiment inside were adhered flat to the card. The font used inside was Chachie. I also designed an envelope for the card, since the smallest size acceptable for mailing is 3.5x5", this one is just a smidge bigger. (I will sheepishly admit to cutting the envie by hand! I was in too big of a hurry to put it together). There is also a graphic on it, but that is optional. I added the little puff of smoke behind the cars by hand with a black gel pen, and filled it in with a white gel pen.
Today I have for you the shape for the card and instructions on how to add in the graphic after you purchase it. Import the file as a texture into MTC, then reduce to 25% (both the shape and the texture). It should fit into the silhouette of the car perfectly. The "Zoom" needs to be reduced to 20%. The MTC file for the card and envie is here (it will download when clicked).
The envelope is my own design and my own texture. I have included in on page 2 of the above file.
Oh yeah - the Blog Candy! Can't forget that, now can I? A $5 Lettering Delights Gift card is up for grabs. All you need to do is:
1. Become a follower of my blog,
2. Leave a comment telling me what you would create with this graphic set if you had it, and
3. Leave a way for me to contact you (your MTC forum name is fine).
Open until 11:59 pm EST on May 4. I will use Random.org to choose a winner and will post the winner on here by 5 pm Thursday. Good luck! And stop back tomorrow for more goodies!
Have a blessed day!
Friday, April 29, 2011
Party on!
Thank you everybody for all the nice comments in the last few days. I enjoy reading them. And today I have yet another card for you. My mojo is flowing well now, hope it doesn't get bogged down after the weekend of work!
This is for a very special lady in my church who is turning 96 this week. I tried to come up with a demure traditional card for her, but it just was not in me!
The image is from Lettering Delights Party Pal graphic set. I designed, printed and cut the card in Silhouette Studio; designed and printed the envie in MTC.
Here's the screen shot of Silhouette Studio before printing and cutting. The font at the top is Fancy Pants (free at dafont), at the bottom Dancin Let (also free here).
Here's the screen shot of my MTC screen before printing:
The texture and the envie are my own design so I can share with you (but not the graphic; sorry, you'll have to pick it up at Lettering Delights). Hey, I just now realized Iwas not consistent and used yet another font spiced things up with another font on the front! I liked the little sparkles (which I guess are really snowflakes); you can get the font Frosty here and the MTC file here.
I blinged out the front with the Gelly Roll clear Stardust pen. I love the sublte bling that it gives; you can't really see it in the picture but I know it is there.
This is for a very special lady in my church who is turning 96 this week. I tried to come up with a demure traditional card for her, but it just was not in me!
The image is from Lettering Delights Party Pal graphic set. I designed, printed and cut the card in Silhouette Studio; designed and printed the envie in MTC.
Here's the screen shot of Silhouette Studio before printing and cutting. The font at the top is Fancy Pants (free at dafont), at the bottom Dancin Let (also free here).
Here's the screen shot of my MTC screen before printing:
The texture and the envie are my own design so I can share with you (but not the graphic; sorry, you'll have to pick it up at Lettering Delights). Hey, I just now realized I
I blinged out the front with the Gelly Roll clear Stardust pen. I love the sublte bling that it gives; you can't really see it in the picture but I know it is there.
I hope that I can be as active, healthy, and blessed as my friend is at 96. Enjoy and have a blessed day!
Thursday, April 28, 2011
We all live in a yellow submarine...
I'm a star! Well, not really but I have my head dubbed over Ringo Starr's head on a video and I feel like a star. This video is for Nurses' Day (May 6) and was taped this last month. I hope to be able to share it with you soon. But that brings me to this card... the song we lip-sync'd to (different lyrics of course) was "I Want to Hold Your Hand" by the Beatles. The Beatles...Yellow Submarine...and I needed a Thank-You card for the videographer. So of course, it had to be the yellow sub from the Seven Seas graphic set at LD.
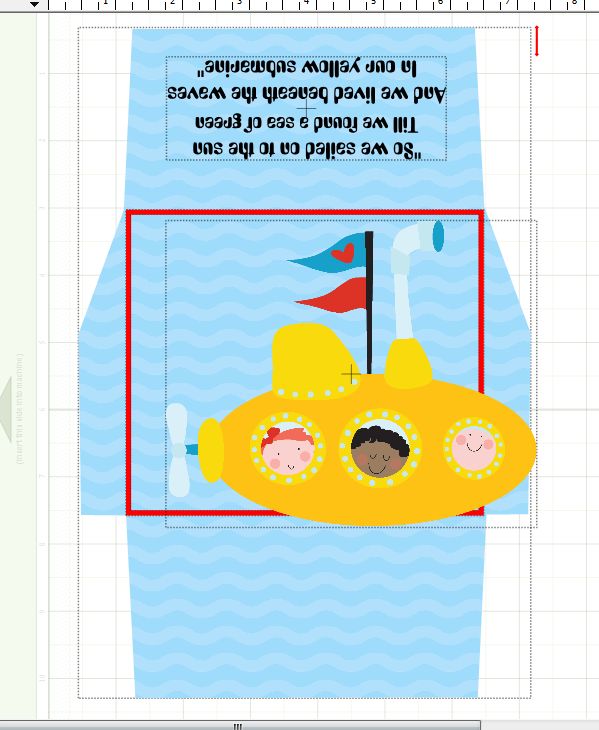
I designed and printed this card in Silhouette Studio, and designed the envie in MTC. Because I will hand deliver the envie, I could decorate the front of it as well. The picture above shows the back flap. Here is the front of the envie:
I brought the image into Silhouette Studio, shadowed it at 0.125 for the blue, then again at about 0.150 for the base. I duplicated the bigger shadow, flipped it horizontally and welded it to the other for a base. The submarine is popped-up on the front. The saying goes on the left inside, with the remainder of the card left for signatures. The screen looked like this when I was ready to print and cut:
Here is the screen shot from MTC for the envie before printing:
I used the font "Yellow Submarine", free from dafont. It unzips to be called Beatles.
Hope you enjoy this card! I love the bright colors and retro feel of it. If you don't already have it, you can grab this set for $1 (or the SVG for $2) while they are on sale - only 1 more day left!
I designed and printed this card in Silhouette Studio, and designed the envie in MTC. Because I will hand deliver the envie, I could decorate the front of it as well. The picture above shows the back flap. Here is the front of the envie:
I brought the image into Silhouette Studio, shadowed it at 0.125 for the blue, then again at about 0.150 for the base. I duplicated the bigger shadow, flipped it horizontally and welded it to the other for a base. The submarine is popped-up on the front. The saying goes on the left inside, with the remainder of the card left for signatures. The screen looked like this when I was ready to print and cut:
Here is the screen shot from MTC for the envie before printing:
I used the font "Yellow Submarine", free from dafont. It unzips to be called Beatles.
Hope you enjoy this card! I love the bright colors and retro feel of it. If you don't already have it, you can grab this set for $1 (or the SVG for $2) while they are on sale - only 1 more day left!
Wednesday, April 27, 2011
My favorite little monster
OK, I guess I am on a roll making cards for boys! This little monster was found here (along with lots of other files!) and I could not resist turning him into a card for my favorite little monster. My friend's three-almost-four (in one month) year old son asked her why he didn't get any mail - so this little guy is all set to go out to Caiden soon. Hey Buddy, you've got mail!
Love those little chompers! I am thinking of adding googly eyes to him as well but I am not sure how it will stand up to mailing and he's awful cute like he is.
I used both MTC and Silhouette Studio for this project. I started out with the image, brought it into MTC to break and color. I applied a texture to the sky and plain colors elsewhere. When I was finished my MTC screen looked like this:
I selected all and exported to png. I brought the png into Silhouette Studio, did some shadowing for the sentiment and made a base to fit the image with two "round rectangles" (that's what SS calls them) welded together. I added an extra monster so I could pop him up on the card. Here is what my SS screen shot looked like when ready to Print-n-Cut:
From here it was all PnC in Silhouette Studio. I designed the envie in MTC and added a twist by having the image on the back of the envie line up. You can see it here:
and here with the flap open slightly:
Love those little chompers! I am thinking of adding googly eyes to him as well but I am not sure how it will stand up to mailing and he's awful cute like he is.
I used both MTC and Silhouette Studio for this project. I started out with the image, brought it into MTC to break and color. I applied a texture to the sky and plain colors elsewhere. When I was finished my MTC screen looked like this:
I selected all and exported to png. I brought the png into Silhouette Studio, did some shadowing for the sentiment and made a base to fit the image with two "round rectangles" (that's what SS calls them) welded together. I added an extra monster so I could pop him up on the card. Here is what my SS screen shot looked like when ready to Print-n-Cut:
From here it was all PnC in Silhouette Studio. I designed the envie in MTC and added a twist by having the image on the back of the envie line up. You can see it here:
and here with the flap open slightly:
You can also see the banding on my printer (almost time for a new print head). It does not do this with the photo paper, only on copy paper. And BTW, here is a good example of the difference between the two different types of paper, coated and uncoated inkjet paper. The envie is printed on 24# Premium Inkjet Paper (with color lok) and the card is printed on Royal Brites Matte Photo Paper (9 mil, or 200 gsm, I think that works out to about 53 #). The coating on the Royal Brites makes that much of a difference! (photo is unaltered other than cropping and lowered screen resolution)
I really am not comfortable sharing the MTC file with the graphic (the site states that the images are "property of Activity Village and are for personal, classroom and library use only") but I can share the MTC envie file without the image, click here. And you can pick up the image for free from the above site. So go make some little monsters!
Subscribe to:
Posts (Atom)